
Table of Contents
ToggleThe arena in Clash Royale isn’t just a pretty backdrop, it’s the battleground where every tile, bridge, and tower placement can swing a match from defeat to victory. Too many players treat the field like a static grid, dropping troops randomly and wondering why their pushes crumble. The reality? Understanding the Clash Royale field, its lanes, zones, and tactical nuances, separates average players from those climbing toward 7000+ trophies.
In 2026, the meta has evolved around field positioning more than ever. From pinpoint building placements that kite units across the river to lane pressure strategies that force opponents into impossible choices, mastering the arena layout is non-negotiable for competitive play. Whether you’re learning defensive positioning or perfecting dual-lane pressure, this guide breaks down everything you need to know about the Clash Royale field to outplay, outthink, and outmaneuver your opponents.
Key Takeaways
- Mastering the Clash Royale field layout—its lanes, zones, tower ranges, and strategic boundaries—is essential for climbing above 7000+ trophies and competing at high levels.
- Proper building placement using techniques like the ‘4-3 plant’ and ‘center plant’ controls troop pathing, kites enemy units across the arena, and maximizes defensive coverage against dual-lane pressure.
- Timing your pushes around opponent elixir counts and card cycles, combined with reading their troop placements, lets you exploit weak lanes and force defensive mistakes.
- Strategic troop placement zones (back, middle, front) directly impact engagement timing and push success—back placement builds elixir advantage while front placement applies aggressive immediate pressure.
- Avoiding common field mistakes like overcommitting to one lane and accidentally activating your opponent’s King Tower through poor unit positioning can improve your win rate by 8-12% on average.
- Understanding the dual-lane system and when to split pressure versus concentrate fire on a single lane adapts your Clash Royale field strategy to counter your opponent’s defensive setup and resource allocation.
What Is the Clash Royale Field and Why Does It Matter?
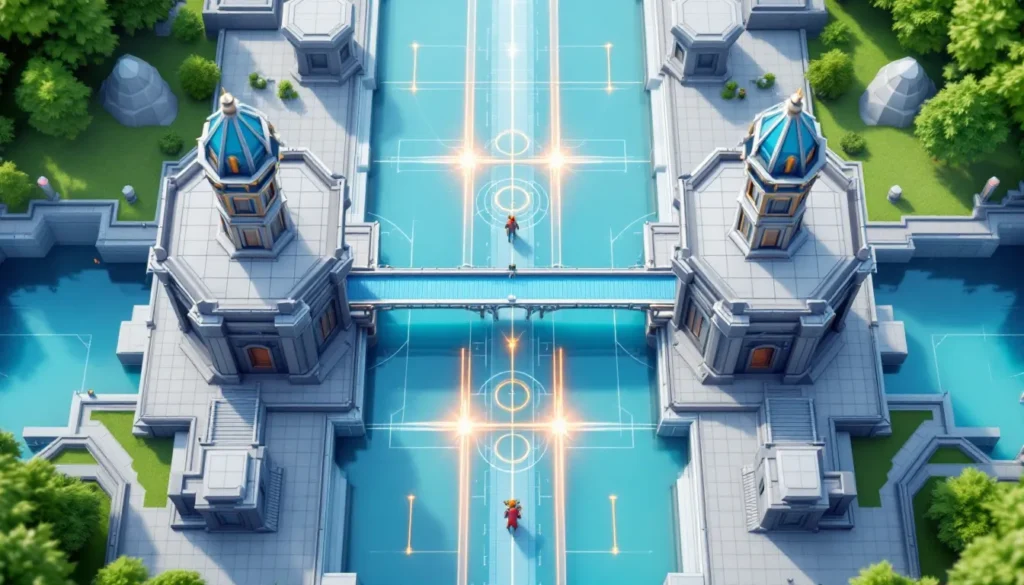
The Clash Royale field is the 18×32 tile arena where every battle unfolds. At first glance, it’s simple: two sides mirrored across a river, three towers per side, and two bridge crossings. But beneath that simplicity lies a tactical depth that defines high-level play.
Every tile on the field has purpose. Troop pathing, building aggro range, and spell radius all interact with the arena’s geometry. A unit placed one tile off can mean the difference between a clean defense and a tower gone. The field doesn’t change match to match, which is both a blessing and a challenge, you can master it, but so can your opponent.
Understanding the Arena Layout
The arena consists of three key zones: your side, the river, and the opponent’s side. Your side contains your King Tower (center) flanked by two Princess Towers. The river divides the battlefield, crossable only via the left and right bridges. Troop placement range extends from your King Tower to just before the river on your side.
Each tower has specific ranges and HP values that haven’t changed in core mechanics since the game’s early builds, though balance patches continuously tweak individual card interactions. The Princess Towers have a range of 7.5 tiles and attack air and ground, while the King Tower has a range of 7 tiles but remains dormant until activated by taking damage.
The 18-tile width creates natural chokepoints at the bridges. The 32-tile length means units dropped at the back take roughly 10 seconds to reach the bridge, giving you time to build an elixir advantage or plan your counter.
The Two Lanes and Center Bridge Strategy
Clash Royale’s dual-lane system forces constant decision-making. Pushing the left lane versus the right lane isn’t random, it should be dictated by your opponent’s defensive buildings, troop placement, and elixir count.
The bridges are 4 tiles wide, meaning area-damage troops like Valkyrie or Mega Knight can hit multiple units clustered crossing. Savvy players exploit this by splitting pushes: placing a tank at the bridge on one lane while applying pressure with cheaper units on the other. This splits your opponent’s defensive resources and can overwhelm players who tunnel vision on one side.
Center placement matters too. Dropping troops like Electro Giant or Golem directly behind the King Tower lets them choose a lane based on tower HP, or you can nudge them left/right by placing them slightly off-center. This keeps opponents guessing and delays their defensive setup.
How Tower Placement Impacts Your Gameplay
Towers aren’t just HP bars to chip down, they’re active defenders with range, targeting priority, and exploitable behaviors. Top-tier players treat towers as extra units on the field.
King Tower Activation Techniques
Activating your King Tower early can flip the momentum of an entire match. Once active, it provides additional DPS and extends your defensive range across both lanes. The classic activation involves units like Fisherman, Tornado, or Firecracker.
The most reliable method uses Tornado to pull enemy troops, like Hog Rider, Battle Ram, or Ram Rider, into King Tower range. Position your tornado carefully: pull toward the center, not just toward the tower. A poorly aimed tornado activates only a Princess Tower, wasting elixir and the activation window.
Fisherman is another activation staple. His hook can yank charging troops into King Tower range, and skilled players use him to pull units like Electro Giant or Royal Giant mid-push, activating the King while also resetting their attack.
Avoid accidental activations. Placing splash troops like Magic Archer carelessly can let your opponent activate their King Tower with minimal elixir investment, giving them a massive defensive edge.
Princess Tower Range and Positioning
Each Princess Tower covers a 7.5-tile radius, which means there are “dead zones” along the river where ground troops can briefly avoid tower fire. Understanding these zones lets you position ranged units, like Musketeer or Firecracker, to damage towers while staying out of range.
Placing a Musketeer at the river’s edge on your side, directly opposite a tower, lets her chip 200+ damage before the opponent can respond. But drop her one tile too far forward, and she’s in tower range, trading inefficiently.
Princess Towers target the nearest troop, so tanking with low-HP units can redirect tower fire away from your win condition. Drop a Skeletons or Ice Spirit ahead of your Hog Rider to absorb the first tower shot, guaranteeing extra hits on the tower.
Mastering Lane Control on the Battlefield
Lane control is the art of dictating where and when fights happen. You’re not just reacting, you’re forcing your opponent into bad trades and uncomfortable positions.
When to Push Single Lane vs. Dual Lane
Single-lane pressure concentrates your elixir into one overwhelming push. Decks running heavy tanks like PEKKA excel here, you stack support troops behind a tanky win condition and steamroll one tower. Single-lane works best when you have an elixir advantage (they just spent 6+ elixir on a failed push) or when one of their towers is low HP.
Dual-lane pressure splits your opponent’s attention and resources. Cheap cycle decks thrive on this: drop a Hog Rider at one bridge and Goblin Barrel at the other. Your opponent must defend both or take significant damage. Dual-lane is strongest when you’re behind in tower HP and need to force mistakes, or when your opponent has defensive buildings that can shut down a single lane.
Timing is everything. Don’t dual-lane push when low on elixir, you’ll overcommit and leave yourself wide open to a counter-push. Watch the elixir bar and your opponent’s cycle. If they just used Mega Knight, that’s your window for dual pressure before it rotates back.
Using the River as a Strategic Boundary
The river isn’t just cosmetic, it’s a tactical divider that affects troop pathing and engagement timing. Ground units can only cross at the two bridges, creating predictable paths you can exploit.
Defensive buildings placed near the river can pull troops across the arena, making them walk farther and take more damage. A Cannon placed three tiles from the river and four tiles from the Princess Tower (the “center placement”) pulls Hog Rider, Giant, and Royal Hogs into both tower ranges.
Ranged troops positioned just behind the river can deal damage while remaining safe from melee attackers. A Princess at the river can chip towers and force a response, and if your opponent sends ground units to counter, they’re stuck on the opposite side while she keeps firing.
Air units ignore the river entirely, which is why decks relying solely on ground defense get shredded by Balloon or Lava Hound. Always account for air pathing when planning lane control.
Optimal Troop Placement Zones on the Field
Where you drop a troop is as important as which troop you drop. Placement zones dictate engagement timing, targeting priority, and whether your push succeeds or collapses.
Front, Middle, and Back Placement Strategies
Back placement (behind the King Tower) maximizes elixir regeneration time. Drop Golem or Electro Giant at the back during single elixir to build a slow push. By the time they reach the bridge, you’ll have 10+ elixir to add support troops. The downside? Your opponent can rush the opposite lane, forcing you to defend while your tank lumbers forward.
Middle placement (between King and Princess Towers) is versatile. Troops reach the bridge faster, giving opponents less reaction time. Use this for Hog Rider, Ram Rider, or Battle Ram when you want immediate pressure without full commitment.
Front placement (at the bridge or river) is for all-in aggression. Bridge spam decks drop Bandit, Royal Ghost, or Lumberjack directly at the bridge to catch opponents off-guard. According to strategic guides on mobile tactics, front placement works best in double elixir or when you’ve just defended and have leftover troops to support the push.
Defensive placement follows the same logic in reverse. Back placement gives your defensive troops time to charge up abilities (like Sparky or Inferno Dragon). Front placement intercepts pushes earlier, keeping damage away from your tower.
Utilizing the Corners and Safe Zones
The four corners of the arena, behind your Princess Towers, are “safe zones” where troops can’t be targeted by enemy towers. These spots are crucial for defensive buildings and ranged units.
Placing Tesla or Inferno Tower in the corner forces enemy tanks to walk into kill zones while your tower adds DPS. The corner also lets defensive buildings survive longer, since they’re out of spell radius from the opponent’s tower.
Princess and Magic Archer benefit massively from corner placement. A Princess in the corner can chip the opposite-lane tower while staying protected. Magic Archer can thread shots across the entire arena from a corner position, hitting both towers if angled correctly.
Avoid corner-dropping melee troops unless you’re defending a specific push. A Mini P.E.K.K.A in the corner won’t reach the center in time to defend a Hog Rider on the opposite lane.
Building Placement Mechanics and Field Coverage
Buildings are the cornerstone of field control. They manipulate troop pathing, absorb damage, and create defensive perimeters that can dismantle even the most coordinated pushes.
Defensive Building Placement for Maximum Coverage
The “4-3 plant” and “center plant” are two fundamental building placements every player should master. The 4-3 plant positions a building four tiles from the river and three tiles from the Princess Tower. This pulls Hog Rider, Ram Rider, and Royal Hogs into range of both towers while keeping the building outside Fireball or Poison range of the tower.
The center plant places the building directly in front of the King Tower, equidistant from both lanes. This defends dual-lane pushes and pulls tanks from either side. It’s especially effective against Golem or Giant pushes, the building draws them center, letting both Princess Towers attack.
Tesla and Cannon are staples because they pull almost everything and cost only 3-4 elixir. Inferno Tower handles heavy tanks but costs 5 elixir, so misplacing it can leave you vulnerable to a counter-push.
Bomb Tower and Goblin Cage offer different utility. Bomb Tower denies swarms and chipper damage over time. Goblin Cage drops a Goblin Brawler on death, providing a mini counter-push. Position them based on what you need to defend next, not just the current push.
Kiting Troops Across the Field
Kiting uses building placement to drag enemy troops across the arena, maximizing tower damage on them while minimizing damage to your towers. The classic kite pulls a tank from one lane to the opposite lane, making it walk through both tower ranges.
Place a Cannon or Tesla opposite the lane where the opponent’s Giant or Golem is pushing. The building’s aggro range pulls the tank across the center, and it takes 1000+ damage from your towers before reaching the building. By then, the tank’s support troops are out of position, and you can pick them off easily.
Kiting also works with troops. A Knight or Ice Golem placed in the center can pull a Prince or Dark Prince off-target, resetting their charge and leading them into tower fire.
Avoid kiting against Balloon or Lava Hound, air units ignore buildings unless specifically targeted by them (Inferno Tower, Tesla). Kiting also fails against Earthquake, which destroys buildings outright.
Advanced Field Awareness for Competitive Play
Field awareness separates good players from great ones. It’s not just knowing what to play, it’s reading the board state, elixir count, and opponent tendencies to predict and counter their next move.
Reading Your Opponent’s Field Positioning
Every troop your opponent places telegraphs their strategy. A Musketeer at the back signals a slow push, they’re building elixir and stacking troops. A Goblin Barrel at the bridge means they’re cycling or fishing for chip damage.
Watch where they place troops, not just what they place. Consistent corner placements for Princess mean they’re playing defensively and chipping. Center placements for tanks mean they’re leaving lane choice flexible, waiting to see your defensive setup.
Defensive building placement reveals their defensive plan. A Tesla in the center means they’re ready for dual-lane pressure. A Cannon off to one side means they’re weak on the opposite lane, exploit that.
Track their spell usage. If they’ve cycled Log and Fireball, you know they’re vulnerable to Goblin Gang or Minion Horde. If they’re holding spells, bait them with lower-value swarms before committing your Skeleton Army or key defense.
Timing Pushes Based on Elixir and Field State
Pushing at the right moment wins games. The best windows are when your opponent is low on elixir (they just defended a big push or overcommitted on offense) or when their key counters are out of cycle.
In single elixir (0:00–2:00), avoid massive investments. Drop a Knight or Hog Rider for early chip damage and to scout their defensive cards. Save heavy pushes for double elixir, when you can support your win condition properly.
In double elixir (2:00 onward), the game accelerates. Strategies discussed in double evolution deck guides emphasize overwhelming opponents with continuous pressure, your elixir regenerates fast enough to defend and counter-push simultaneously.
Spell cycling becomes viable in overtime when a tower is below 500 HP. A Rocket or Fireball directly on the tower can close out the game, but only if you can defend efficiently with leftover elixir.
Field state matters. If your opponent has a Mega Knight or P.E.K.K.A defending their tower, pushing that lane is suicide. Switch lanes or wait for their defensive unit to cross the river, then counter-push behind it.
Common Field Mistakes and How to Avoid Them
Even seasoned players make field mistakes that cost trophies. Recognizing and fixing these errors sharpens your gameplay fast.
Overcommitting to One Lane
Tunnel vision kills. Dropping 15 elixir into a single lane push feels powerful until your opponent Rockets your entire stack and counter-pushes the opposite lane with 10 elixir while you’re broke.
Overcommitment happens when players try to force a tower down instead of reading the field state. If your first push gets fully countered, don’t immediately reload the same lane. Switch lanes, apply chip damage, or defend and build an elixir advantage.
Beatdown decks (like Golem or Lava Hound) naturally invest heavily in one lane, but even they need to know when to abandon a push. If your opponent drops Inferno Dragon + Electro Wizard, sinking more elixir into that tank is throwing. Take the loss on that push and prepare your next cycle.
Cycle decks avoid overcommitment by design, cheap cards let you switch tactics mid-match. If you’re running a heavy deck, build in versatility: include troops like Mega Minion or Bats that can defend or support a push.
Poor Placement Leading to Tower Activation
Accidental King Tower activations are the #1 avoidable mistake. Placing Magic Archer near the river lets opponents use Tornado to activate their King. Firecracker knockback can trigger King activation if positioned carelessly.
Another common error: dropping a Skeleton Army or Goblin Gang too close to the river against a Bowler or Executioner. Their splash damage crosses the river and can chip your King Tower, activating it for them.
Units with area-damage or piercing shots, like Magic Archer, Hunter, or Firecracker, require precise placement. Drop them at the back or corners, never near the center river tiles.
Also, don’t randomly drop units in front of your King Tower when there’s no threat. An opponent can send a Tornado or use a charging unit like Prince to deflect your troop into the King, gifting them activation. According to analysis from Game8, tower activation increases win rate by 8-12% on average, so avoiding accidental activations is crucial.
Meta Decks and How They Exploit Field Positioning in 2026
The 2026 meta revolves around field control more than raw DPS. Evolution cards, reworked spells, and balance changes in recent patches have shifted the game toward positional mastery.
Hog Cycle 2.6 remains a field-control classic. The deck uses cheap units, Skeletons, Ice Spirit, Cannon, to dictate engagements and cycle back to Hog Rider rapidly. Placement is everything: Cannon in the 4-3 plant, Musketeer at the back for counter-push, Ice Golem to kite. One misplaced Cannon and the cycle collapses.
Log Bait exploits bait mechanics and field positioning. Goblin Barrel forces spell usage, while Princess and Goblin Gang apply pressure from safe zones. The deck thrives on corner placements and cross-lane chip damage, making opponents choose which threat to address.
Golem Beatdown leverages back placement and slow pushes. Drop Golem behind the King Tower in single elixir, stack Night Witch, Baby Dragon, or Lumberjack behind it, and steamroll a lane. The field strategy is pure: overwhelm one side with HP and DPS, then defend the counter-push with leftover elixir.
Mighty Miner Control (popular since the Mighty Miner’s season release) uses his drilling ability to bypass ground defenses, making traditional building placement less effective. Counter-strategies involve air units, spells, and creative placement of all card types to disrupt his pathing.
Evolution Royal Giant decks dominate high-ladder play. The evolution provides extra range and HP, making him harder to kite. Players position him at the river’s edge to outrange defensive buildings, and support with Fisherman to pull blockers away. Defending requires precise building placement in the center or kiting with air units.
Clash Royale’s evolving meta demands that players adapt their field strategies seasonally. Checking tier lists and meta reports from sources like Twinfinite helps you stay ahead of balance changes and shifting deck archetypes.
Conclusion
The Clash Royale field isn’t a static board, it’s a dynamic battleground where every tile, tower, and troop placement shapes the outcome. Mastering lane control, building placement, and field awareness transforms you from a button-masher into a strategic competitor.
From activating your King Tower early to exploiting kiting mechanics and reading opponent positioning, the tactics in this guide give you the edge in 2026’s competitive scene. Field mastery isn’t about memorizing placements, it’s about adapting to every match, every push, every elixir trade.
Whether you’re perfecting your cycle timings, refining champion strategies, or grinding toward ultimate champion, understanding the Clash Royale field is your foundation. Get out there, apply these principles, and dominate the arena one perfectly placed troop at a time.


