
Table of Contents
ToggleIf you’ve spent any time in Skyrim’s modding community, you’ve probably noticed the near-universal presence of BodySlide in mod requirements. It’s the backbone of character customization, letting players reshape bodies and rebuild armors to match their vision. Whether you’re aiming for hyper-realistic proportions or fantasy aesthetics, BodySlide gives you the control most vanilla RPGs don’t.
But here’s the catch: BodySlide can feel intimidating for newcomers. The interface is dense, the prerequisites stack up, and one wrong step can leave you with invisible bodies or armor clipping through skin. This guide cuts through the confusion. By the end, you’ll know exactly how to install, configure, and master BodySlide for Skyrim Special Edition in 2026, plus how to troubleshoot the common headaches that trip up even experienced modders.
Key Takeaways
- Skyrim BodySlide reshapes body and armor meshes to prevent mismatches between your custom body mod and outfits, ensuring visual consistency throughout the game.
- Install BodySlide through Mod Organizer 2 and always launch it via MO2 to ensure it recognizes your installed mods and outputs files to the correct location.
- CBBE remains the dominant body mod choice in 2026 with superior compatibility and community support compared to UNP alternatives.
- Always batch-build every outfit and armor with BodySlide after installing your body mod to prevent invisible bodies or clipping armor issues.
- Use Outfit Studio for advanced tasks like converting armors between body types and manually fixing clipping problems using brush tools like Inflate and Deflate.
- Maintain a stable modded setup by creating dedicated output mods, rebuilding after each new armor installation, and backing up custom presets to avoid losing your character’s unique body shape.
What Is BodySlide and Why Do Skyrim Players Use It?
Understanding BodySlide’s Role in Skyrim Modding
BodySlide is a standalone tool that rebuilds body and outfit meshes based on slider presets. Think of it as the intermediary between a body mod (like CBBE or UNP) and the armors your character wears. When you install a body replacer, it changes your character’s nude mesh. But vanilla armors and most modded outfits are built for the default body, they won’t conform to your new proportions. That’s where BodySlide steps in.
Here’s how it works: BodySlide takes the armor meshes and morphs them to match your chosen body preset. You select a preset (or create your own with sliders), click “Build,” and BodySlide generates new mesh files. Without this step, you’ll get the dreaded “body-armor mismatch”, where your character’s body looks great naked, but turns into a default Bethesda mesh the moment they put on armor.
BodySlide also includes Outfit Studio, a mesh editing tool that lets you manually adjust, convert, and fix outfits. It’s essential for advanced users who want to convert armors between body types or fix clipping issues on specific pieces.
BodySlide vs. RaceMenu: Key Differences Explained
New modders often confuse BodySlide and RaceMenu, since both affect character appearance. Here’s the distinction:
RaceMenu is an in-game character creation overhaul. It adds sculpting tools, morphs, and overlays directly in the character creation menu. You can adjust facial features, tattoos, and even body proportions in real-time while playing. RaceMenu’s body morphs are stored on the save file and affect only your player character.
BodySlide works outside the game. It rebuilds meshes for bodies and outfits, affecting all NPCs who use the same body mod. Changes are permanent until you rebuild again. RaceMenu is for in-game tweaks: BodySlide is for foundational body and armor setup.
Most players use both: BodySlide to establish the baseline body and rebuild armors, then RaceMenu for fine-tuning the player character’s unique look.
Essential Requirements Before Installing BodySlide
SKSE and Mod Organizer 2 Setup
Before touching BodySlide, you need the right foundation. SKSE (Skyrim Script Extender) is mandatory for most advanced mods, including many body replacers and RaceMenu. As of 2026, SKSE64 version 2.2.6 supports Skyrim Special Edition build 1.6.640 and newer. Download it from the official SKSE site, extract the files to your Skyrim directory, and always launch the game through skse64_loader.exe.
Mod Organizer 2 (MO2) is the preferred mod manager for serious modders. Unlike Vortex or NMM, MO2 uses a virtual file system that keeps your Skyrim directory clean and makes troubleshooting infinitely easier. BodySlide needs to be run through MO2 to ensure it sees all your installed mods and outputs files to the correct location.
If you’re still using manual installations or an older manager, switching to MO2 now will save you hours of headache later. Set up MO2, configure your executables to include SKSE, and verify everything launches correctly before moving forward.
Choosing Your Base Body Mod (CBBE vs. UNP)
BodySlide doesn’t work alone, it needs a base body mod to reshape. The two dominant options are CBBE (Caliente’s Beautiful Bodies Enhancer) and UNP (Unified UNP). Your choice determines which armors and presets you can use, so pick carefully.
CBBE is the most popular body mod in 2026. It has massive community support, thousands of compatible armor conversions, and ships with BodySlide integration out of the box. CBBE supports both realistic and stylized proportions, and its physics support (via CBPC or 3BBB physics) is robust. Most new armor mods release CBBE versions first.
UNP and BHUNP (the updated UNP variant) offer a different aesthetic baseline, often leaner and more athletic by default. BHUNP (Unified UNP High Poly) adds higher polygon counts and better physics, plus BodySlide support. UNP has a smaller but dedicated community, and some older armor mods only support UNP.
You can technically install multiple body mods and use BodySlide to convert between them, but for beginners, pick one and stick with it. CBBE is the safer bet for maximum compatibility in 2026.
How to Install BodySlide for Skyrim Special Edition
Downloading BodySlide and Outfit Studio
BodySlide and Outfit Studio are bundled together in a single download available on Nexus Mods. The current stable release as of March 2026 is BodySlide 5.6.3, which includes full support for Skyrim Special Edition, Skyrim Anniversary Edition, and even Skyrim VR.
Download the main file (not the optional files, those are for older Skyrim versions or specific body mods). You’ll also want to grab any BodySlide presets you plan to use. Many body mods (like CBBE) include BodySlide files in their installer, but standalone preset packs are common too.
Proper Installation Through Your Mod Manager
Never install BodySlide manually. Always use MO2 (or your mod manager of choice) to keep everything organized.
- In MO2, click the download icon and select “Install Mod.”
- Navigate to your downloaded BodySlide archive and install it.
- Name it something clear like “BodySlide and Outfit Studio” and activate it in your left pane.
- Right-click the Data tab in MO2, select “Executables,” and add BodySlide.exe as a new executable. Point it to
[MO2 install path]/mods/BodySlide and Outfit Studio/CalienteTools/BodySlide/BodySlide.exe. - Do the same for Outfit Studio if you plan to use it.
Now BodySlide will show up in your MO2 executable dropdown. Always launch it through MO2, launching it directly will cause it to miss your installed mods.
Configuring BodySlide Settings for the First Time
Launch BodySlide through MO2. The first thing you’ll see is a dropdown menu labeled “Outfit/Body.” This lists all the outfits and bodies BodySlide can build, pulled from your installed mods. If it’s empty, BodySlide isn’t seeing your mods, double-check that you launched it through MO2.
Next, click the Settings icon (wrench) in the bottom-right. Key settings:
- Game Data Path: Should point to your Skyrim Special Edition Data folder. MO2 handles this automatically, but verify it’s correct.
- Output Path: Should be set to your MO2 overwrite folder or a dedicated BodySlide output mod. MO2’s overwrite is fine for testing: create a permanent mod once you’re happy with your build.
- Target Game: Set to “Skyrim Special Edition.”
Hit OK and you’re ready to start building.
Using BodySlide to Customize Character Bodies
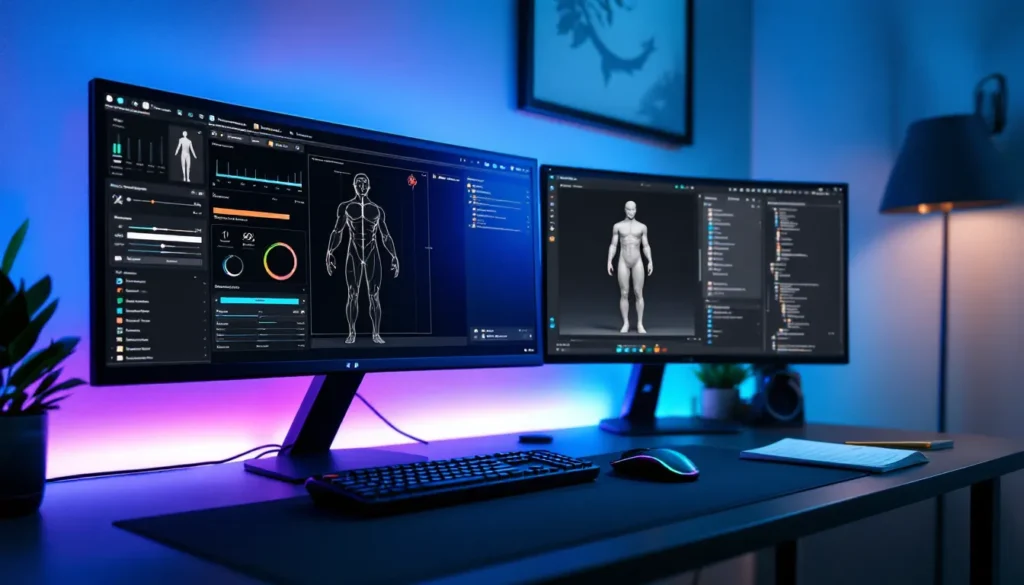
Navigating the BodySlide Interface
BodySlide’s UI is dense but logical once you understand the flow. The top section contains:
- Outfit/Body dropdown: Select which outfit or body you want to build.
- Preset dropdown: Choose a saved body shape preset.
- Group Filter: Filter by mod or category (e.g., “CBBE Bodies” or “Vanilla Outfits”).
The middle section shows sliders for adjusting body proportions, bust, waist, hips, arms, legs, and more. Each slider morphs the mesh in real-time in the preview window on the right.
The bottom section has the critical buttons:
- Build: Generates the selected outfit/body with your current slider settings.
- Batch Build: Builds all outfits in the selected group at once (huge time-saver).
- Preview: Shows a 3D preview of your changes before building.
Selecting and Applying Body Presets
Presets are pre-configured slider settings saved as XML files. Most body mods come with several defaults, “Curvy,” “Slim,” “Athletic,” etc.
To apply a preset:
- Select your body mod from the Outfit/Body dropdown (e.g., “CBBE Body”).
- Choose a preset from the Preset dropdown (e.g., “Curvy”).
- Click Preview to see how it looks.
- If satisfied, click Build to generate the mesh.
You’ll need to build both the body and all your outfits with the same preset. That’s where Batch Build shines, select a group filter (like “CBBE Outfits”), choose your preset, and click Batch Build. BodySlide will rebuild every outfit in that group to match your body shape.
Creating Custom Body Shapes with Sliders
Presets are a starting point, but BodySlide’s real power is custom shapes. Move sliders to adjust proportions, BodySlide updates the preview in real-time.
Key sliders to know:
- Breasts/Butt/Belly: Adjust primary proportions.
- Waist/Hips: Define the torso shape.
- Arms/Legs: Control limb thickness.
- Height: Some presets include height sliders, though this can cause issues with animations.
Once you’ve dialed in a shape you like, save it as a new preset (File > Save Preset As). Name it something memorable. Now you can apply it to all your outfits with Batch Build.
Building Outfits and Armor to Match Your Body
This is the step most newcomers skip, and it’s why they get body-armor mismatches. After you’ve built your body, you must rebuild every outfit and armor to conform to that body shape.
- Select your preset.
- Use the Group Filter to select “CBBE Outfits” (or whatever group matches your body mod).
- Click Batch Build.
- Wait for BodySlide to process. Depending on how many outfits you have, this can take a few minutes.
Check “Build Morphs” if you’re using RaceMenu body morphs (this adds extra compatibility). Leave it unchecked if you’re not sure.
Once done, BodySlide will output the new meshes to your overwrite folder. Create a new mod from the overwrite, name it “BodySlide Output,” and activate it below your body mod in the load order.
Advanced BodySlide Techniques with Outfit Studio
Converting Armors to Different Body Types
So you found the perfect armor mod, but it’s only available for UNP and you’re running CBBE. Outfit Studio lets you convert it.
- Launch Outfit Studio through MO2.
- File > Load Project. Select your UNP armor.
- Outfit Studio will show the armor mesh over a reference body.
- Right-click the reference body, choose “Conform All,” and select your CBBE body slider set.
- Outfit Studio morphs the armor to the new body shape.
- Save the project as a new BodySlide project, then build it in BodySlide.
This process isn’t perfect, manual tweaking is often needed, but it’s how most armor conversions are made. Expect to spend 15-30 minutes per armor piece getting it right.
Fixing Clipping and Mesh Issues
Clipping happens when body parts poke through armor, or when armor pieces overlap. Outfit Studio’s brush tools let you manually adjust problem areas.
- Load the clipping outfit in Outfit Studio.
- Use the Inflate brush to push mesh sections outward (fixes armor clipping into the body).
- Use the Deflate brush to pull sections inward (fixes body parts poking through armor).
- Use the Move brush for precision adjustments.
- Toggle X-Ray mode (Alt+X) to see the body mesh beneath the armor.
Work in small increments, over-inflating looks weird in-game. Save frequently and test in-game to verify fixes. Clipping fixes are armor-specific, so you’ll repeat this for each problematic piece.
Common BodySlide Problems and How to Fix Them
Troubleshooting the Black Face Bug
The infamous black face bug isn’t technically a BodySlide issue, but modders often encounter it alongside body replacers. It happens when the NPC’s head mesh doesn’t match their face texture, usually due to conflicting facegen data.
Fixes:
- Rebuild facegen data with the Creation Kit or SSEEdit.
- Ensure your body mod isn’t overwriting NPC facegen files (check for conflicts in MO2’s right pane).
- Some body mods include NPC replacers that bundle facegen, these can conflict with NPC overhauls like “Bijin” or “Pandorable’s NPCs.”
BodySlide itself won’t cause black face, but if you’re running multiple beauty mods, load order matters. Face meshes should load after body mods.
Resolving Missing or Mismatched Body Parts
You load the game and your character’s head is floating above an invisible body. Or the torso is fine but the hands and feet are missing. This happens when:
- You didn’t build the body mesh in BodySlide (only built outfits).
- Your body mod isn’t active in MO2.
- BodySlide output files are being overwritten by another mod.
Check MO2’s right pane (the “Overwrite” section). If your BodySlide output mod is being overridden by the original body mod or another armor mod, the wrong meshes are loading. Move your BodySlide output mod below conflicting mods in the left pane to give it priority.
Also verify you built the actual body (not just outfits). Select “CBBE Body” in BodySlide, choose your preset, and hit Build. Missing hands/feet usually means you forgot the body build.
Addressing Outfit and Armor Compatibility Issues
You’ve built everything, but one armor still looks wrong, neck seams, clipping thighs, or a jutting belly. This is usually because:
- The armor wasn’t designed for your body mod. Some armors are hard-coded for vanilla bodies and can’t be reshaped properly.
- You need to rebuild that specific armor manually in Outfit Studio.
- The armor uses custom sliders you didn’t build (check the BodySlide dropdown, some armors have unique slider sets).
For stubborn armors, load them in Outfit Studio and manually conform them to your body. Some armors from PS4 Skyrim mods or console ports don’t include BodySlide support at all, you’ll need to convert them yourself or find a PC alternative.
Best BodySlide Presets and Body Mods in 2026
Top CBBE Presets for Realistic and Fantasy Styles
The CBBE ecosystem is massive. Here are the standout presets in 2026:
Realistic:
- Natural Bodies: Subtle proportions, minimal exaggeration. Great for immersive playthroughs.
- Curvy Realistic: Hourglass shape with realistic weight distribution. Popular for vanilla-plus aesthetics.
- Athletic Slim: Lean muscle definition, low body fat. Fits warrior or rogue characters.
Fantasy/Stylized:
- Bombshell: Exaggerated proportions, pinup aesthetic. Not lore-friendly, but wildly popular.
- Thicc: Emphasizes hips and thighs while keeping waist proportional. Meme-worthy name, solid execution.
- Custom Preset Repository (CPR): A massive collection of user-submitted presets on Nexus. Hundreds of options ranging from anime-inspired to hyper-realistic.
Most players mix and match, use a realistic base, then tweak sliders for specific NPCs with RaceMenu.
Popular UNP and BHUNP Alternatives
If CBBE isn’t your style, BHUNP (Unified UNP High Poly) is the modern UNP successor. It combines UNP’s aesthetic with CBBE’s BodySlide integration and 3BBB physics support. BHUNP is less common than CBBE but growing fast, especially among players who prefer athletic or fantasy anime aesthetics.
Top BHUNP presets:
- BHUNP 3BBB Advanced: Full physics support with natural bounce.
- Seraphim Body: High-fantasy proportions with ethereal vibes.
- Natural UNP: Faithful to classic UNP’s athletic build.
BHUNP’s main downside is armor compatibility. Many modders still prioritize CBBE conversions, so expect to do more manual conversions in Outfit Studio if you go BHUNP.
Tips for Maintaining a Stable Modded Setup with BodySlide
BodySlide itself is stable, but combining it with dozens of armor mods and NPC replacers can get messy. Here’s how to keep things clean:
Use a dedicated output mod. Don’t leave BodySlide files in MO2’s overwrite folder. After every batch build, right-click the overwrite, select “Create Mod,” and name it “BodySlide Output [Date].” This makes it easy to roll back if something breaks.
Rebuild after every armor mod installation. Installing a new armor without rebuilding it in BodySlide guarantees mismatches. Make it a habit: install armor, open BodySlide, rebuild.
Keep notes on your preset. If you’re using custom sliders, export your preset and back it up. Losing a custom body shape after 50 hours of gameplay is rage-inducing.
Test in-game frequently. Performance metrics from sources like Tom’s Hardware show that excessive mesh complexity can tank FPS, especially with physics-enabled bodies. If you’re dropping frames in cities, consider simplifying your body preset or reducing physics calculations.
Watch for script bloat. Body mods with heavy scripts (especially those with real-time morphs) can slow down save files over time. DSOGaming has covered several cases where poorly optimized body physics mods caused save corruption on long playthroughs. Stick to well-maintained mods with active authors.
Document your load order. When troubleshooting, knowing which mods touch body meshes is critical. Use MO2’s notes feature or a simple text file. Future you will be grateful.
Conclusion
BodySlide transforms Skyrim’s character customization from static presets into a fully malleable system. It’s not plug-and-play, but once you’ve built your first successful body and batch-built your armors, the process becomes second nature. The payoff is a visually cohesive world where every outfit fits your vision, whether that’s gritty realism or high fantasy.
Don’t skip the troubleshooting section. Even veteran modders hit snags with mesh conflicts and missing builds. And if you’re planning a heavily modded setup, consider branching out into conversion work with Outfit Studio, being able to adapt any armor to your body type opens up the entire Nexus catalog.
Skyrim’s modding scene isn’t slowing down in 2026. New body mods, physics frameworks, and preset packs drop weekly. BodySlide remains the glue holding it all together.


