
Table of Contents
ToggleDimhollow Crypt isn’t just another dungeon crawl in Skyrim, it’s the gateway to one of the game’s most compelling storylines. Tucked into the mountains south of Dawnstar, this vampire-infested ruin marks the beginning of the Dawnguard DLC questline and your first encounter with Serana, one of the most memorable companions in the game. Whether you’re siding with the vampire hunters or plotting to join the bloodsuckers yourself, you’ll need to navigate its winding corridors, solve its brazier puzzle, and fight through waves of undead to reach the mysterious artifact at its heart. This guide breaks down everything you need to know: exact locations, step-by-step puzzle solutions, combat strategies, and all the loot worth grabbing before you leave.
Key Takeaways
- Dimhollow Crypt is the starting point of Skyrim’s Dawnguard DLC and introduces Serana, one of the game’s most memorable companions.
- The brazier puzzle requires a specific sequence of four activations (braziers 1, 4, 2, and 5 in clockwise order) to light all six braziers and unlock the central artifact.
- Vampires in Dimhollow Crypt are weak to fire damage and resistant to frost, so equip fire-based weapons or spells for faster combat.
- Serana becomes an essential quest companion once freed and can’t be killed, making her invaluable for fighting through the return journey.
- After exiting Dimhollow Crypt, you must escort Serana to Castle Volkihar, where you’ll choose to join either the Dawnguard or the Vampire Lords—a decision that shapes the entire DLC questline.
Where to Find Dimhollow Crypt
How to Start the Awakening Quest
Dimhollow Crypt becomes relevant once you’ve triggered the Dawnguard questline. To start, you need to be at least level 10 and either hear a rumor about the Dawnguard or receive a courier with a recruitment letter. Head to Fort Dawnguard, located in the southeastern corner of the Rift, accessible through Dayspring Canyon.
Once you meet Isran, the Dawnguard leader, he’ll send you on the “Awakening” quest. Your objective: investigate Dimhollow Crypt and eliminate the vampire threat inside. Isran marks the location on your map, so you won’t have to stumble around blindly.
Navigating to Dimhollow Crypt from Major Holds
Dimhollow Crypt sits in the snowy mountains south of Dawnstar, roughly southwest of Mzinchaleft and north of Mor Khazgur. If you’re fast traveling, Dawnstar is your closest major hold.
From Dawnstar, head directly south. You’ll pass through some rough terrain, expect to encounter ice wolves, snow bears, and possibly a frost troll if RNG isn’t on your side. The entrance is carved into a mountainside, marked by stone architecture and a wooden door. It’s easy to miss if you’re not paying attention to your compass marker.
Alternatively, from Whiterun, head northwest past Dustman’s Cairn and continue into the mountains. This route takes longer but keeps you on more traveled paths. Players without fast travel unlocked should budget 10-15 minutes from Dawnstar, longer if you’re stopping to harvest ingredients or deal with random encounters.
Preparing for the Dimhollow Crypt Dungeon
Recommended Level and Skills
While the quest activates at level 10, tackling Dimhollow Crypt at that level can be rough. Level 12-15 is the sweet spot for a balanced experience. The dungeon features multiple vampires, death hounds, and thralls, all of which hit harder than your average bandit.
If you’re running a melee build, invest in One-Handed or Two-Handed perks and make sure your Block or Heavy Armor skills are at least 30. Mages should have Destruction at 40+ with access to fire spells, vampires take extra damage from flame. Stealth archers (because of course) should focus on Sneak and Archery at 30+, though the tight corridors limit sniping opportunities.
Essential Gear and Supplies
Stock up before you go. Dimhollow Crypt has zero merchants and limited healing items scattered around.
Potions: Bring at least 10-15 health potions. Stamina potions help if you’re power-attacking or sprinting through sections. Magicka potions are essential for mages since you’ll be casting frequently.
Resist Frost: Vampires love frost magic. A resist frost potion or enchanted gear reduces incoming damage significantly. If you’ve got a Resist Magic enchantment, even better.
Fire Damage: Whether it’s a Fire Enchanted Weapon, fire spells, or fire scrolls, bring something that burns. Vampires are weak to it, and it makes fights noticeably shorter.
Soul Gems: If you’re relying on enchanted weapons, carry filled soul gems to recharge them. You won’t find a ton of gems in Dimhollow unless you’re hunting every urn and chest.
Follower Recommendation: If you haven’t recruited Serana yet (obviously), bring a tanky follower like Lydia or Stenvar. They’ll absorb aggro while you deal damage. Avoid squishy mages, they tend to die quickly in tight quarters.
Exploring the Outer Cavern and Initial Encounters
Dealing with Vampires and Thralls
The moment you step inside Dimhollow Crypt, you’ll overhear vampires talking about a discovery. Don’t expect them to be friendly. The first chamber contains two vampires and a couple of thralls (human servants). Vampires cast frost spells and drain life on contact, so keeping your distance helps if you’re not built for face-tanking.
Focus fire on the vampires first. They’re the real threat. Thralls are melee-only and go down fast, but they’ll swarm you if ignored. Use the pillars and rubble for cover if you’re a ranged build. Stealth players can pick off thralls silently before the vampires detect you, making the fight much easier.
You’ll encounter Death Hounds alongside some vampire packs deeper in. These are tougher than regular wolves and inflict disease on hit. Cure Disease potions or a blessing from a shrine before entering saves you the hassle of contracting something nasty. Similar strategies for dealing with vampire encounters have been documented extensively in game guides for dungeon crawling, where crowd control and target prioritization make all the difference.
Navigating the First Chamber Puzzle
After clearing the entry area, you’ll descend into a larger chamber with a locked gate. The solution isn’t a traditional puzzle, it’s a chain pull hidden behind some rubble on the left side of the room. Look for a gap in the stone wall: the chain is easily missed if you’re rushing.
Pull the chain, and the gate opens. Beyond it, you’ll find more vampires and a winding corridor leading deeper into the crypt. Keep an eye out for pressure plates, some trigger spike traps. They’re not lethal but chunk your health if you’re careless.
The Brazier Puzzle: Step-by-Step Solution
Understanding the Brazier Mechanism
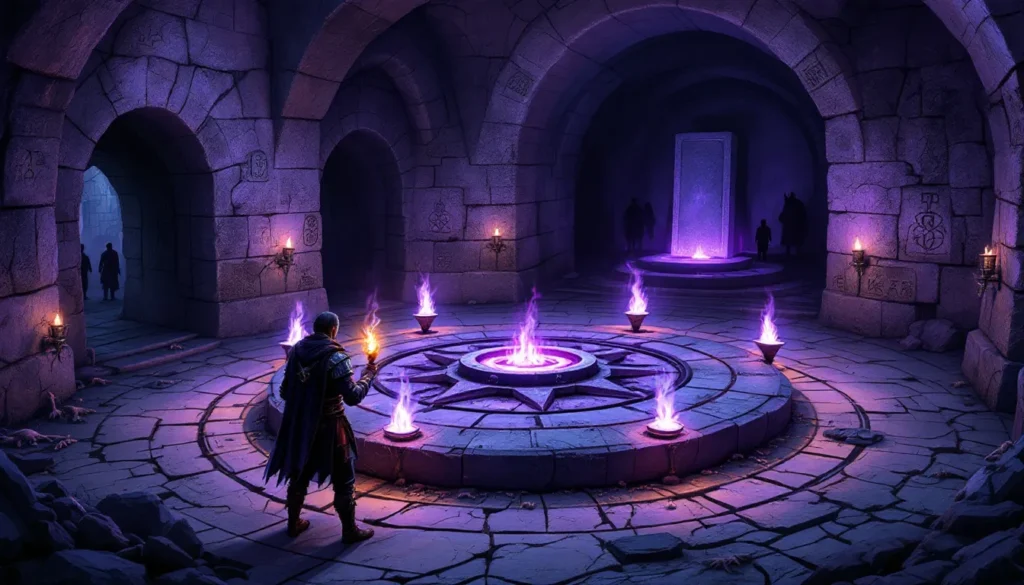
The brazier puzzle is Dimhollow Crypt’s signature mechanic and the only part that actually requires thinking. You’ll enter a circular chamber with a central platform surrounded by several stone braziers. Purple flames flicker in some of them, and interacting with a brazier toggles its state, and the states of adjacent braziers.
The goal: light all the braziers simultaneously to unlock the central platform and reveal the artifact. It’s a logic puzzle similar to the “lights out” minigames in other RPGs. The trick is understanding that toggling one brazier affects its neighbors, so random clicking won’t work.
Correct Brazier Activation Sequence
Here’s the exact solution if you’re starting with the default brazier states (as they appear in the Awakening quest). Number the braziers 1 through 6, starting from the one closest to the entrance and moving clockwise.
- Activate Brazier 1 (entrance side)
- Activate Brazier 4 (opposite side)
- Activate Brazier 2 (clockwise from entrance)
- Activate Brazier 5 (two spots clockwise from Brazier 4)
All six braziers should now be lit. The central platform lowers, revealing a pool of blood and the mysterious artifact at the center. If the puzzle doesn’t solve, you may have clicked a brazier out of order, reset by leaving the room and re-entering, or reload a save.
Some players report that brazier states can vary if you’ve visited Dimhollow Crypt before starting the quest (rare, but possible with mods or console commands). In that case, trial and error works, but the four-activation sequence above solves the default puzzle every time.
Freeing Serana from the Monolith
Approaching the Strange Artifact
Once the braziers are lit, descend to the blood pool. In the center stands a large stone monolith etched with strange runes. Approach it and interact to trigger a cutscene. The monolith cracks open, releasing a wave of magic and revealing Serana, a vampire who’s been sealed inside for centuries.
Don’t attack her. Even though being a vampire, Serana is a quest-essential NPC and won’t turn hostile. She’s disoriented and asks what’s happening, dialogue here is mostly flavor, though you can press her for details about who she is and why she was imprisoned.
Meeting Serana: What to Expect
Serana becomes a temporary follower the moment she’s freed. She’s unique among Skyrim companions, she can’t be killed, uses powerful Destruction and Conjuration magic, and carries an Elder Scroll in her inventory (which you can’t take). She’ll raise zombies to fight for you and cast ice spikes at enemies, making her one of the strongest followers in the game.
You can’t dismiss her until you complete the next stage of the quest, so get used to her company. She’ll make occasional comments as you explore, hinting at her backstory. For players interested in exploring more complex NPC interactions and storylines, the Skyrim Dark Brotherhood questline offers similarly deep narrative content. If you accidentally leave her behind, she’ll catch up or wait near the entrance, don’t worry about losing her.
Fighting Your Way Out of Dimhollow Crypt
Combat Strategies for the Return Journey
Once Serana is free, the dungeon doesn’t magically empty. You’ll need to fight your way back to the entrance, and the game spawns additional enemies to make the return trip interesting. Expect more vampires, death hounds, and possibly a Vampire Nightstalker or two, tougher variants with higher health and stronger spells.
The good news: Serana pulls her weight. Let her lead and draw aggro while you flank or snipe from behind. Her conjured zombies act as meat shields, soaking up damage and keeping pressure off you. If you’re a melee build, coordinate with her summons, let them engage first, then move in for cleanup.
Frost-resistant gear continues to pay off. Vampires spam ice magic, and without resistance, you’ll burn through potions fast. If you’re a mage, switch to fire spells exclusively, vampires melt under sustained flame damage.
Using Serana as a Companion Effectively
Serana’s AI is smarter than most followers, but she’s not perfect. She tends to stand in doorways and block your path, which is annoying in narrow corridors. If she’s in your way, sheathe your weapon and push past her, she’ll reposition after a second.
She won’t trigger traps, so don’t worry about her setting off pressure plates. But, she will get in the way of your swings if you’re using a two-handed weapon. Ranged builds synergize better with her playstyle since you’re both attacking from a distance.
Don’t bother healing her, she’s essential and can’t die. If her health drops to zero, she’ll kneel for a few seconds to recover, then get back up. Focus on keeping yourself alive: she’ll handle herself.
Notable Loot and Collectibles in Dimhollow Crypt
Unique Items and Weapons
Dimhollow Crypt doesn’t have legendary artifacts, but it’s worth looting thoroughly. The vampires drop enchanted gear occasionally, look for pieces with Fortify Magicka or Resist Frost enchantments. You’ll find a couple of chests scattered throughout the dungeon, usually near boss-level vampires or in side rooms.
One chest near the brazier chamber contains leveled loot: gold, gems, and possibly an enchanted weapon (iron to elven quality, depending on your level). Another chest is tucked in the corner of the final chamber before you exit, behind some rubble. Easy to miss if you’re rushing.
The vampires themselves carry vampire dust when looted, useful for alchemy. Death hounds drop death hound collars, which are vendor trash but worth a few septims.
Valuable Alchemy Ingredients and Soul Gems
Alchemy enthusiasts should check every shelf and table. Dimhollow Crypt has a decent supply of garlic, nightshade, and bleeding crown mushrooms scattered around. Garlic is ironic given the vampire infestation, but it’s there.
You’ll find petty and lesser soul gems in urns and on corpses. Not game-changing, but useful for recharging low-level enchanted gear. If you’re running a mage build with Soul Trap, the humanoid enemies provide easy soul-filling opportunities.
Check the alchemy lab near the entrance chamber, it has a few uncommon ingredients like imp stool and swamp fungal pods. Many players overlook detailed walkthroughs that catalog collectibles in dungeons like this, missing out on crafting materials that add up over time.
Common Mistakes and How to Avoid Them
Skipping the brazier puzzle explanation: If you brute-force the puzzle by randomly clicking, you’ll waste time. Follow the sequence above and save yourself the frustration.
Not bringing fire damage: Vampires resist frost and take bonus damage from fire. Bringing frost-based weapons or spells makes fights unnecessarily long. Switch to fire or use physical damage if you’re melee.
Ignoring Serana’s dialogue: She drops hints about the Dawnguard storyline and her backstory. Skipping dialogue means missing context for later quests. Talk to her during downtime.
Leaving Serana behind accidentally: If you sprint ahead and leave her in combat, she’ll eventually catch up, but it’s annoying. Stick together, especially during the return trip.
Not looting the final chest: The chest near the exit is easy to miss. Before you leave, do a quick sweep of the last chamber. You’ve cleared the dungeon, might as well grab everything.
Forgetting to cure diseases: Death hounds inflict diseases on hit. If you leave Dimhollow Crypt diseased, it’ll drain your stats until you cure it. Use a potion or visit a shrine immediately after exiting. Numerous guides on status effects and debuffs emphasize how easy it is to forget disease management mid-quest.
What Happens After Leaving Dimhollow Crypt
Escorting Serana to Castle Volkihar
Once you exit Dimhollow Crypt, Serana asks you to escort her home, Castle Volkihar, located on an island northwest of Solitude. The quest marker updates, and you’ve got two options: fast travel to Icewater Jetty (the dock nearest the castle) or hoof it manually.
Fast traveling with Serana is safe, she’ll appear with you at the destination. If you travel on foot, expect random encounters. Serana will fight alongside you, making the trip easier than solo wandering.
Castle Volkihar is accessible via a small dock with a boat. Interact with the boat to cross automatically. The castle itself is imposing, crumbling stone and gothic architecture. Serana’s father, Lord Harkon, awaits inside, and meeting him triggers the next major decision in the Dawnguard questline.
Choosing Your Path: Dawnguard or Vampires
When you meet Harkon, he offers you a “gift”, vampire lord powers in exchange for joining his cause. This is your faction choice point. Accept, and you become a vampire lord, siding with the Volkihar Clan. Refuse, and Harkon dismisses you, sending you back to Fort Dawnguard to continue as a vampire hunter.
Both paths offer unique quests, perks, and powers. Vampire lords get transformation abilities, life drain, and blood magic. Dawnguard members receive crossbows, armored trolls, and vampire-hunting gear. You can switch sides later with some effort, but the initial choice shapes your early questline experience.
Serana remains a companion regardless of your choice, though her dialogue shifts based on faction alignment. She’s one of the few NPCs who acknowledges your decisions throughout the DLC, making her a fan favorite.
Conclusion
Dimhollow Crypt is more than a dungeon, it’s the launching point for one of Skyrim’s best expansions. Master the brazier puzzle, loot efficiently, and leverage Serana’s strengths in combat, and you’ll breeze through. Whether you’re team Dawnguard or ready to embrace the vampire life, the choices you make after leaving this crypt ripple through the entire questline. Now get out there, solve that puzzle, and decide where your loyalty lies.


